Working with custom <head> elements
Configuring custom elements
Web pages delivered from Brightspot include the standard HTML elements that a browser needs to render pages correctly. These elements are configured in your sites' themes. Administrators can add additional HTML elements to the delivered pages. Examples include the following:
- Adding or overriding styling elements with a
<style>element. - Adding or overriding dynamic behavior with a
<script>element. - Adding additional meta data with a
<meta>element. - Adding external resources with a
<link>element. - Adding child elements allowed within a parent
<head>element.
Configuring custom head elements
To configure custom head elements:
- Click > Admin > Sites & Settings.
- In the Sites widget, select the site for which you want to configure custom head elements, or select Global to configure custom head elements for requests made to any site.
- Under Front-End > Advanced > Custom Scripts and Styles, click Add Custom Head Elements.

 Adding a custom element
 - In the Internal Name field, enter an internal name for this custom head element. You can use the internal name to quickly identify this configuration in the list of custom head elements (particularly when the configuration is collapsed).
- From the Request Matcher field, select one of the available matchers.
- To prevent Brightspot from returning this element, toggle on Disabled. For an explanation of this toggle, see "Disabling a custom head element," below.
- Complete the other fields for the selected request matcher.
- For the default Path Request Matcher, configure the following fields:
- HTTP Methods—Select the methods that the request must include, or leave blank to match all HTTP methods. For a description of the HTTP methods, see HTTP request methods.
- URL Pattern—Java-compliant regular expression that the request's path must match, or leave blank to match any path. For an introduction to regular expressions, see Regex 101; for a Java-compliant regex tester, see Java Regular Expression Tester.
- Content Types—List of content types that must be associated with the request, or leave blank to match all content types.
- Projects can implement other request matchers as necessary.
- For the default Path Request Matcher, configure the following fields:
- To prevent Brightspot from checking matches in subsequent custom head elements after satisfying the criteria in this matcher, toggle on Stop Processing. For details about this toggle, see "Interrupting rule evaluation," below.
- Under Elements, do the following:
- Click ⨁ and select one of the available elements.
- In the Internal Name field, enter an internal name for this element. You can use the internal name to quickly identify this configuration in the list of elements (particularly when the configuration is collapsed).
- For each attribute field, enter a value. Ensure the values you enter are appropriate for the element you are configuring.
- Repeat steps a–c to configure additional elements for this request matcher.
- Click Save.
How Brightspot delivers custom head elements
Brightspot examines each incoming request, and can return custom elements associated with those requests. The following sections describe the various mechanisms Brightspot uses to determine which custom elements to return.
Matching criteria for incoming requests
Brightspot delivers custom elements unconditionally or only for those incoming requests that satisfy criteria you define. Brightspot's standard version comes with a path request matcher that applies the following filters to incoming requests:
- Request's HTTP method, such as GET or POST. (For a description of the HTTP methods, see HTTP request methods.)
- Requested asset's content type, such as Article or Gallery.
- Request's path matching a pattern, such as starting with
/customersor containing the wordintegrations.
Order of matching criteria
The order of your matching criteria determines the element returned. Suppose you design three groups of custom head elements Group 1, Group 2, and Group 3, each with its own matching criteria, as in the following illustration.


Brightspot evaluates all the matching criteria in order, and the sent elements are based on those rules that are successfully evaluated. In this example, Brightspot evaluates first the criteria in Group 1, then in Group 2, and then in Group 3. If an incoming request matches all three rules, then Brightspot sends all the elements defined in all three rules. If an incoming request matches only the first two rules, then the elements sent are those defined in Group 1 and Group 2.
Disabling a custom head element
Suppose Group 1, Group 2, and Group 3 configure different attributes of a <meta> element, as in the following example.
Normally, a request satisfying the matching criteria of all three groups sends three <meta> tags:
<meta name="product" content="brightspot"><meta name="product" content="assignment_desk"><meta name="product" content="ops_desk">
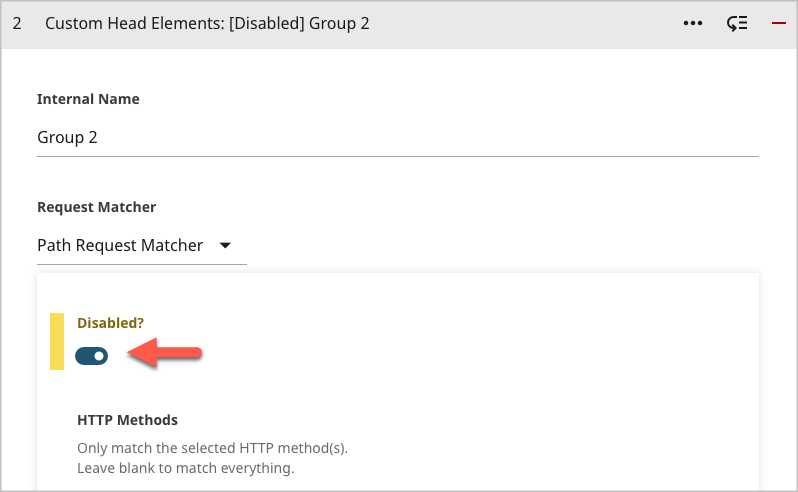
If you want to avoid sending the second tag, you can disable the evaluation in Group 2, as in the following illustration.


Because Group 2 is disabled, Brightspot sends the following two <meta> elements if the incoming request satisfies the criteria in Group 1 and Group 3:
<meta name="product" content="brightspot"><meta name="product" content="ops_desk">
Interrupting rule evaluation
Suppose Group 1, Group 2, and Group 3 set a value for a <meta> tag's attributes. If you stop evaluation at Group 2, then Brightspot sends one of the following:
<meta name="brightspot">configured inGroup 1(ifGroup 2is not a match)<meta name="brightspot">and<meta name="assignment_desk">configured inGroup 1andGroup 2(ifGroup 2is a match).
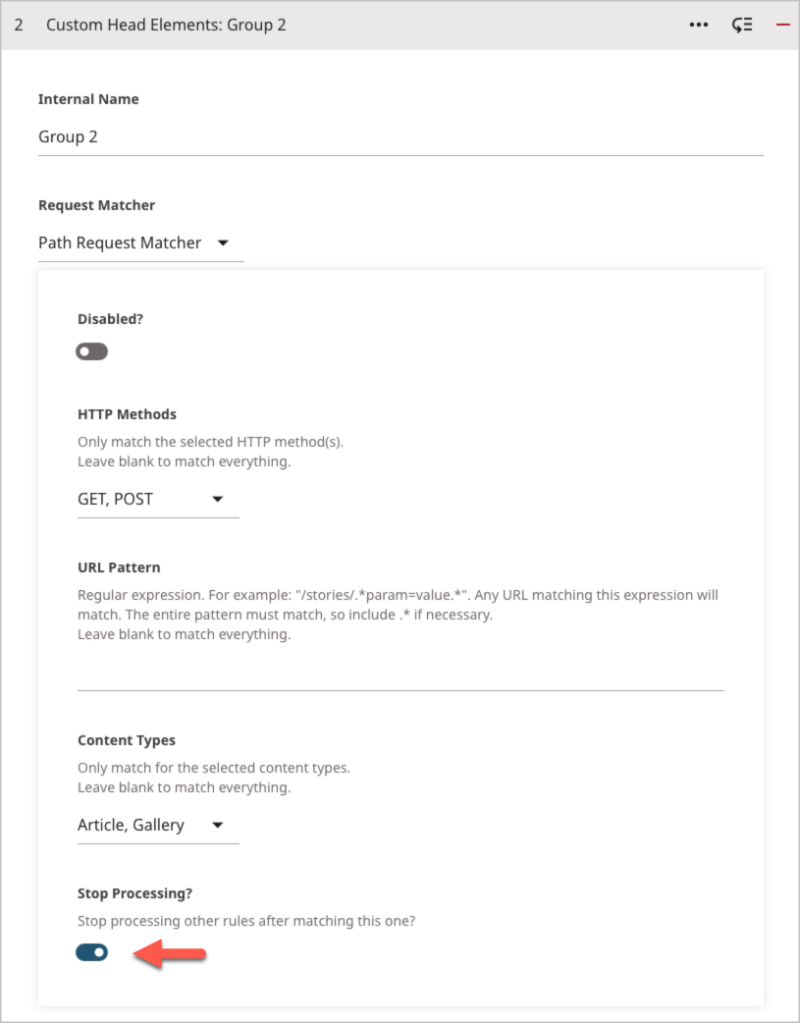
If you want to avoid sending the header configured in Group 3, you can stop processing in Group 2, as in the following illustration.


Disabling a rule takes precedence over rule interruption. If you stop evaluation at Group 2 and also disable Group 2, then Brightspot proceeds to Group 3 and assigns the attributes configured in Group 1 (if Group 3 is not a match) or the attributes in Group 1 and Group 3 (if Group 3 is a match).
Example: Modifying styling without front-end development
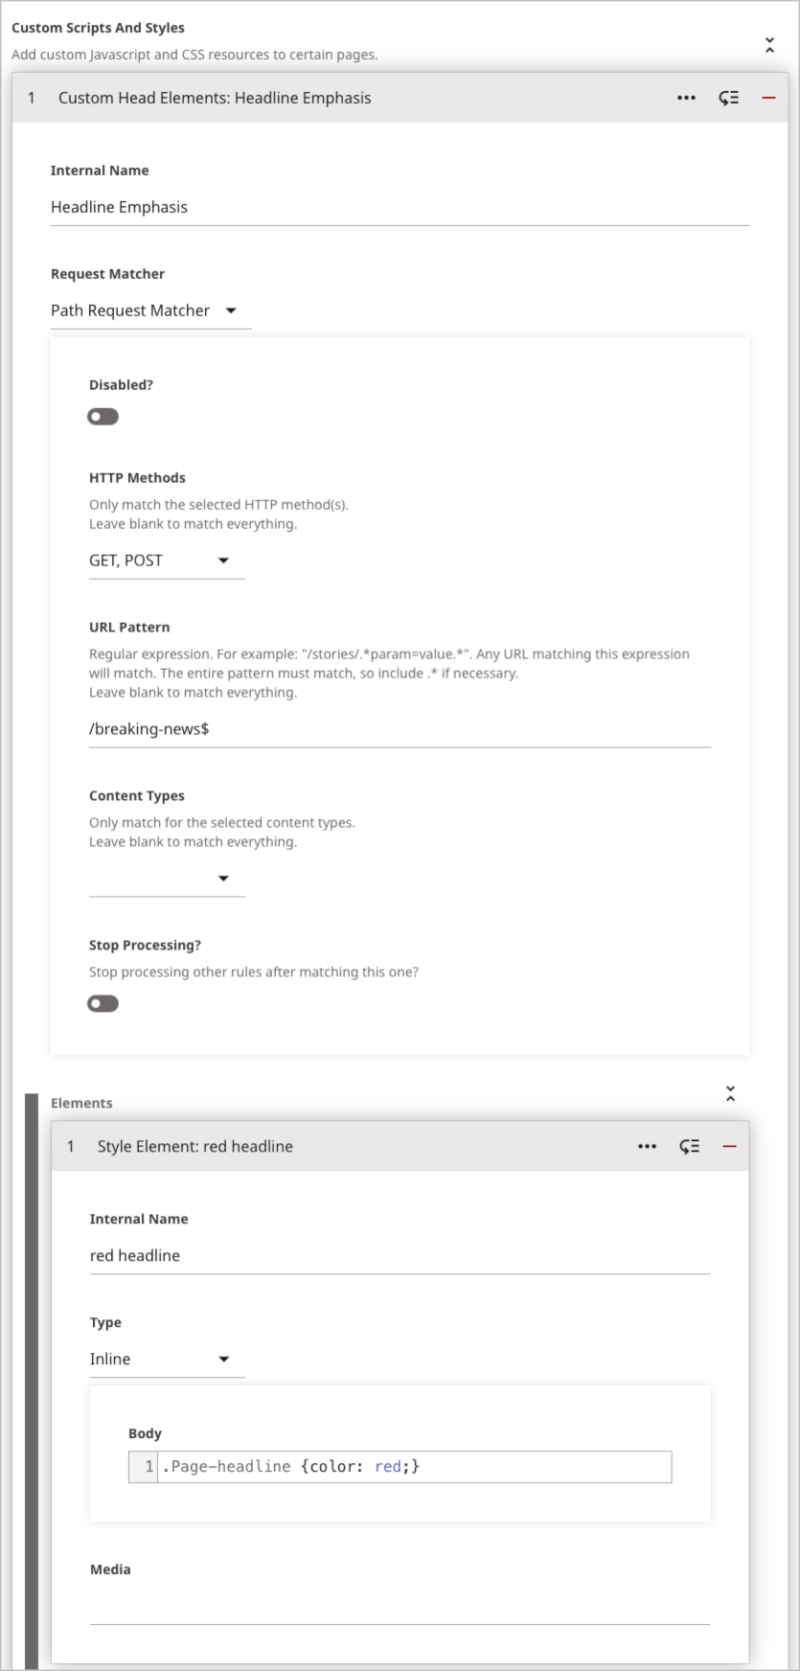
A news site has a dedicated page with the slug /breaking-news that contains promos to its latest stories. The site's theme sets the page title Breaking News in black, and management prefers that the color be red. Front-end developers are working on other priorities, so instead the site admin can inject a one-line CSS instruction .Page-headline {color: red;} that changes the title to red.


Referring to the previous illustration, Brightspot sets the page title in red when the incoming request satisfies the following criteria:
- The request uses the method GET or POST.
- The requested asset's URL ends with
/breaking-news.
When these two criteria are met, Brightspot includes with the web page the CSS statement .Page-headline {color: red;}.