Creating audiences using Tealium targets
As a Tealium user, you can create Tealium audiences from website traffic data ingested from your site, and pass those audiences to Brightspot as targets. The following procedure describes how to configure a Brightspot audience using a Tealium target.
To create an audience from a Tealium target:
- From the Navigation menu, select Admin > Audiences. The New Audience widget appears.
- In the Name field, enter a name that reflects the audience you are defining. For example, Weekend Visitors reflects an audience that views content on weekends.
From the Content Type Group field, select Create New. A content edit page appears.

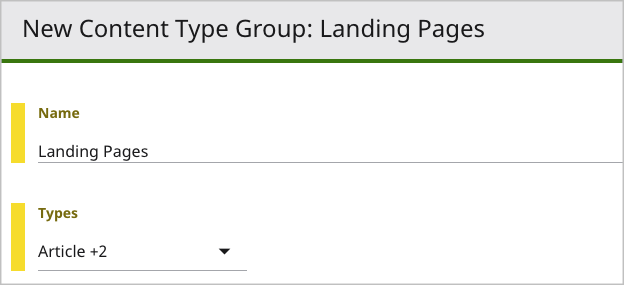
 New content type group form
In the content edit page, do the following:
- In the Name field, enter a name for the content type group, such as Landing Pages.
- From the Types list, select the content types that you want to apply to this audience.
- Click Save.
- Click Back. You return to the New Audience widget.
- From the Content Type Group list, select the content type group that you just created.
- Under Sites, click and select the sites to which the audience applies, or leave blank to apply the audience to all sites.
Under Targets, do the following:
- Click , and select Tealium Target.
- From the Target selection field, click and select a target from the content picker. (If there are no Tealium targets in the content picker, check your configuration as described in Configuring the Tealium integration, or wait a few days until Tealium accumulates traffic from your site.)
- In the Description field, enter a description for this target. Brightspot displays this description in the content edit form.
If you want to establish a tentative audience size while Tealium accumulates counts during the grace period, do the following:
- In the Target field, click . A content edit form appears.
- In the Initial Size field, enter the target’s tentative size prior to the grace period. During the grace period, Brightspot ingests the target counts from Tealium. After the grace period, Brightspot uses the total count as the updated audience size.
- Click Back.
- Repeat steps a–d to configure additional targets.
- Click Save.
You can now create variations for the audience; for details, see Creating content variations.